
Holding a Crayon Visual Schedule
Holding a crayon is often a child's very first step toward handwriting readiness, and it's worth teaching deliberately rather than assuming it will develop on its own. This free teaching guide breaks it into 7 steps, from handing over the crayon to fading your support as your child becomes independent.
At a Glance
- What it is: A free, 7-step printable teaching guide for learning to hold and use a crayon.
- Who it's for: Young children building early fine-motor and pre-writing skills.
- What you get: A full-resolution PDF chart, emailed instantly.
- How to use it: Use hand-over-hand support at first, then gradually let your child hold the crayon on their own.
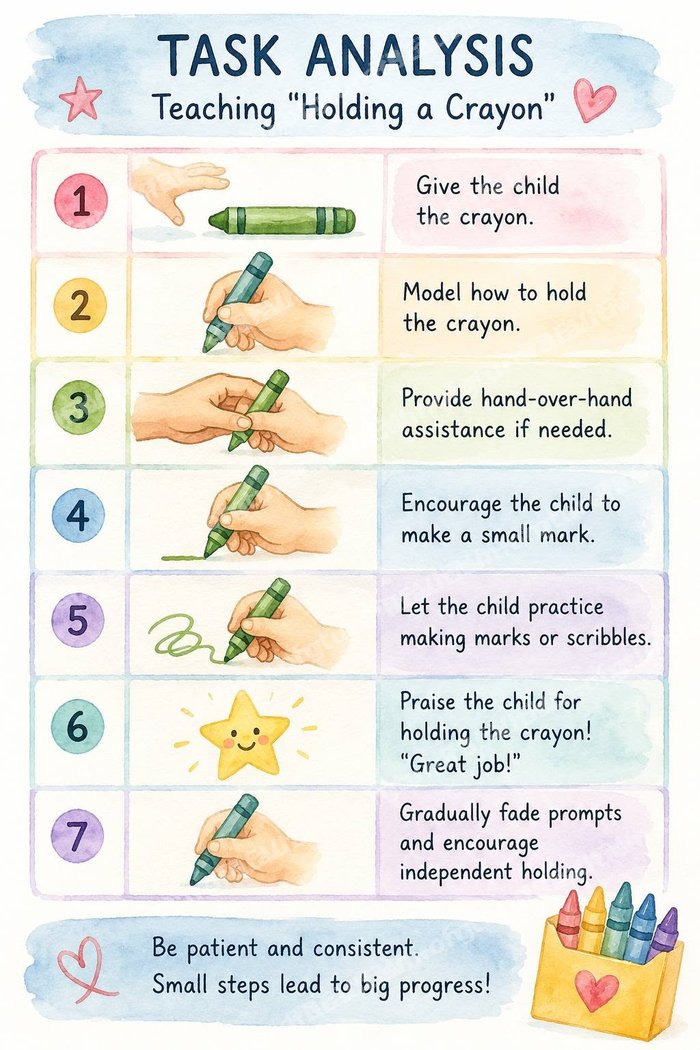
Preview of the printable chart — download the full-resolution, watermark-free PDF below.
What's in this guide
- Why a visual schedule helps
- What you'll get in the free PDF
- How to use it
- What If My Child Resists Holding the Crayon at All?
- Frequently asked questions
Why a Visual Schedule Helps
Fine-motor skills like a crayon grip often need direct modeling and hands-on practice rather than simply being left out with paper and hoping the right grip develops. Breaking the skill into small steps, with modeling and hand-over-hand support built in, gives your child a clear path from “holding the crayon” to “making marks on purpose.”
What You'll Get in the Free PDF
A single-page, 7-step visual task analysis:
- Give the child the crayon
- Model how to hold the crayon
- Provide hand-over-hand assistance if needed
- Encourage the child to make a small mark
- Let the child practice making marks or scribbles
- Praise the child for holding the crayon
- Gradually fade prompts and encourage independent holding
Get the Free Holding a Crayon Visual Schedule PDF
Enter your details below and we'll email the printable PDF to you instantly.
How to Use It
Start by modeling the grip yourself, slowly and clearly, then offer hand-over-hand support if your child needs it to feel the motion. Let early practice be about making any mark at all — a scribble counts as success — rather than aiming for careful drawing right away. Praise every attempt, and gradually reduce your physical support as your child's own grip becomes more consistent.
What If My Child Resists Holding the Crayon at All?
If your child resists the crayon itself, try a shorter, thicker crayon that's easier to grip, or a different writing tool (a chunky marker, chalk) that feels less awkward in the hand. Keeping sessions very short and ending on a successful moment, even a tiny one, helps build a positive association rather than frustration.
Frequently Asked Questions
What grip should I be teaching?
The chart focuses on getting the crayon between the thumb and fingers in a workable grip rather than a single 'correct' adult pencil grasp — refinement toward a more mature grip tends to come later, which is covered in our separate Pencil Grasp guide.
How long should practice sessions be?
Keep sessions short, just a few minutes, especially at the start, and build up gradually as your child's tolerance and interest grow.
What if my child only wants to use the crayon to tap or bang it instead of drawing?
That's a normal part of early exploration — you can gently redirect toward making a mark on paper, but allow some of that sensory exploration too, since it's part of how children first get comfortable holding a new tool.